Tuesday, October 18, 2016

Peel & stick vinyl on the fireplace


The wife is out of town and the kids spent last night at gramma and grampa’s, so to stave off the quiet of a baseball-less evening I spent last night putting some tile on the fireplace. 
I liked that there was still light when I started on this.
Do vinyl times need to acclimate to their environment? I don’t think so. But these have been in the house since my Columbus Day off anyway so I assumed they would be fine. And the first one went up no problem. The first one, at least.

Okay, I can imagine this looking okay.
With some grid lines down I stuck some tiles on as a test and went upstairs to get a drink, only to hear a crashing sound while I was pouring something brown. Ooops. I had been using a grout float to put the tiles on firmly but that didn’t seem to be doing the trick. But a few dabs of additional glue, along with some thumb tacks to make sure they maintained surface connection, and they seem to be staying on the wall fine. I have read that this can degrade the adhesive already on, but some thumbtacks holding tiles in place after gluing seems to be giving it enough surface contact to form a strong enough bond. Fingers crossed. 

The point of no return.
Using larger tiles meant it was time to start cutting to fit remaining spaces pretty quickly, but it turned out that wasn’t so bad. These tiles scored and broke clean and easy! There was a lot of cutting though, and pretty soon I was starting to wonder if I shouldn’t have gone with more of an asymmetrical pattern. I did say “get some tile on the fireplace” though, so I wasn’t planning on finishing it in one night. 
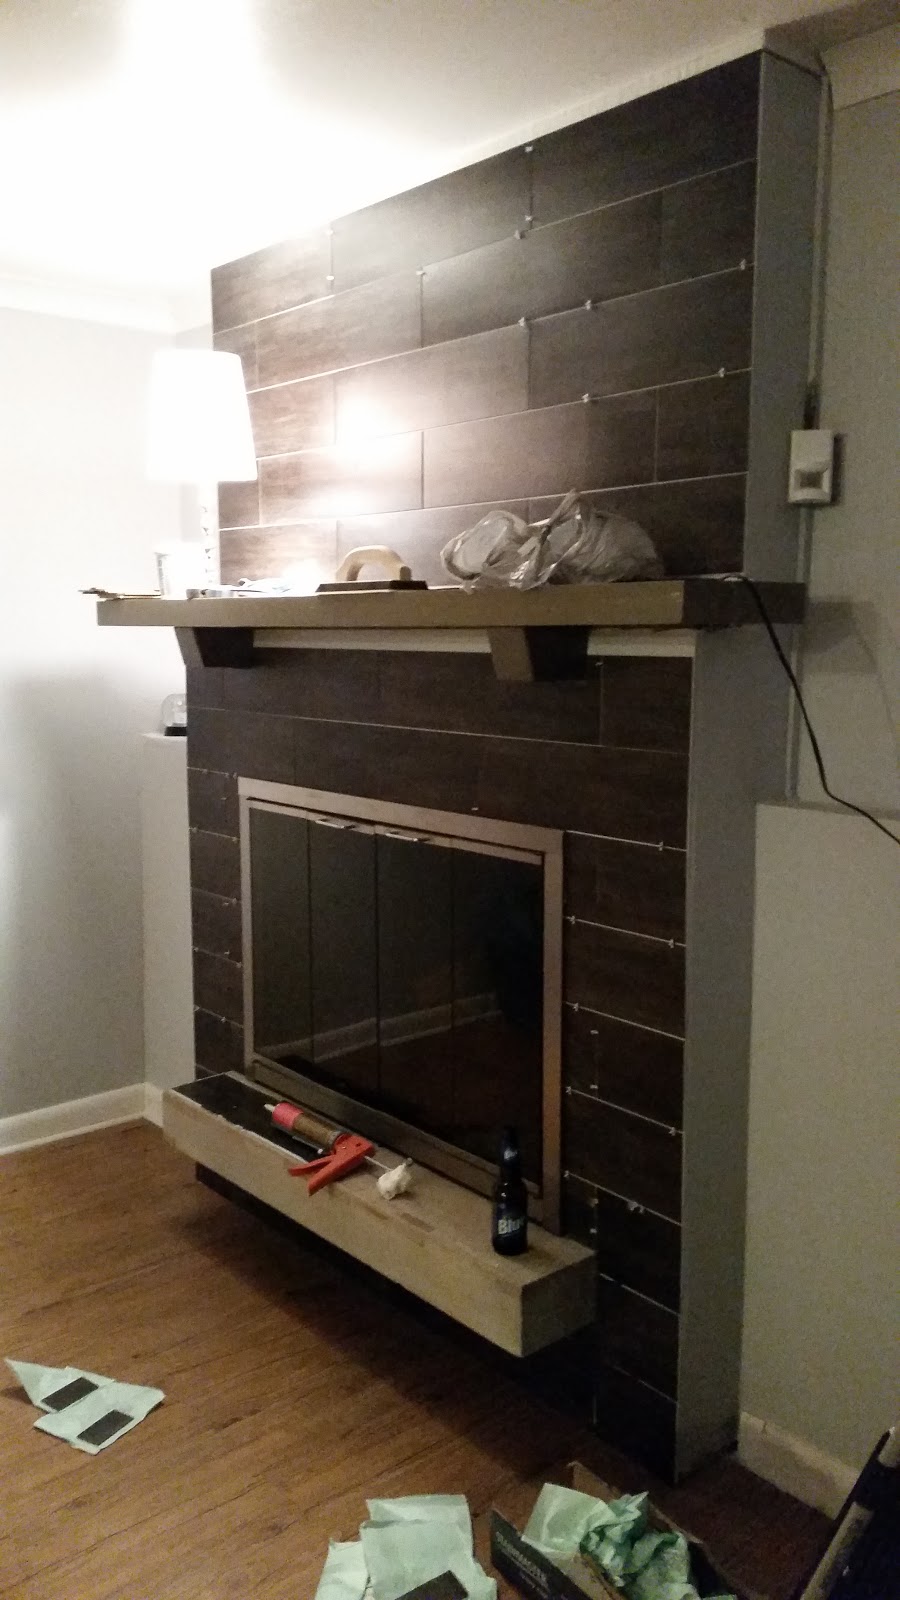
Not finished but completely covered.

Planning or not though, that’s what happened. Maybe it was my delicious dinner (more on that later), or maybe it was the beers that kept finding their way downstairs, but once I got down to the bottom half I wasn’t stopping before everything was tiled. I don’t think the drinking hurt my spacing; all in all I don’t think it looks half bad. 

Unfortunately that means now I have to grout. I hate grout. 

Tuesday, October 11, 2016

Okay, now don't rain on it!


Building a patio table for our new house was such a positive experience that it basically inspired this entire blog and just about everything else I’ve done around the house this year. Most of it has gone pretty well, and I have the table to thank for that. So imagine how sad I felt to see how much abuse that table has taken during a hot, wet, first summer in the suburbs.
Seeing this wounded me on a spiritual level
Basically all the rain we’ve had got the poly to start peeling and no one wants to sit down and get flakes of polyurethane all over them. Thankfully, with the office closed for Columbus Day I had some time to fix things up before the weather turned too much. Now I just have to hope it doesn’t rain for the next few days. 

I was optimistic that sanding everything down and re-sealing would be enough to keep the table usable for at least one more summer. The first few passes with the sander had me a little dubious though.
Woof. This did not have me feeling any better.
Once the polyurethane came out things started to turn around though. I managed to get two coats on through the course of the afternoon while working on a bunch of other stuff around the house, and thankfully it didn’t end up raining afterwards. Fingers crossed I have good weather and a few minutes a day to sneak a few more coats on this week. 

First coat. Okay, that looks much better.
I’m hoping that picking up a cover will give the table enough added protection this winter that things stay in decent shape. I love this table but if we get one more summer out of it that might be enough. There are a lot things I would do differently if I was building one today, and with a hand me down cooler ready for the stand treatment, I think building a plain table with nicer wood might yield better results. Those are questions for next summer though, as I spend the fall trying to make sure the table we have now makes it there.  

Monday, October 3, 2016

Scrap wood crates


Since my initial plan to use plain 1x4s for baseboards didn’t pan out, I had a bunch of 6 footers laying around as scrap in the garage. Granted they were pretty nice scrap, but still scrap. I didn’t know what to do with them until I was coming home from work late last week and saw the horrible mess that had become our garage shelves. The idea of slapping some crates together seemed like a good idea, and a quick glance at the scrap bin said I had plenty of material around. So I snuck some time while the Bears were on to throw some together. 
Okay, that looks like it could work.
Sizing them up with some other scrap looked good, and since the garage shelves are 17” deep then I had dimensions to work from. 5 6-footers meant I had plenty to chop up, I was shooting to get three crates out of everything.
Lots of cutting, lots of noise w/the kids napping.
These were pretty nice scrap to be working with so things came together pretty cleanly. There were some off joints on the first one since I used two other scrap pieces for the front and back but they were still sturdy.
Hmmm, I don't think I planned those bottom kregs too well...
Thank goodness I had the other scrap too, b/c I ended up with enough to have bottoms and sides for three crates but only front and back for one. The other two got other scrap, and even got nails instead of screws b/c I ran out of those too. Nothing like going into a project and finishing with what you find lying around.
Glue and two nails, good to go.
It’s not like these crates are going anywhere, so as long as they can hold what I put in them and keep them semi-organized we’re good to go. These will help on the organization front but the shelves themselves probably need a second or third look at how to get cleaned up.
Jeez, an hour's+ work and barely a drop in the bucket.
But now all the random tools I’ve got for specialized jobs like painting, drywall, and tiling all have a specific spot, which sounds like it would be pretty important to staying organized.Hopefully I can finish the fireplace without buying any new tools.