Sunday, April 30, 2017

work for hire, as long as I get paid in pizza

Talking about how much I enjoy having the chance to work around the house kind of bit me in the ass this weekend; the in-laws are getting ready to sell their house and they asked if I wanted to put a backsplash in their kitchen. Being the good son in-law that I am I said yes, and that's the story of how I spent my Saturday and some of my Sunday putting tile up.
as blank spaces go it's not too huge

but there's plenty to work around
It's not a huge space, but they went with 3x6 tiles we had to buy individually, so both buying and getting started seemingly took an eternity out of my Saturday. They did do a lot of prep work though, so they had a pretty good idea of the number of tiles and bullnose tiles. Lots and lots of tiles.

so many tiles
Without a sheet I thought it was a little more stressful making sure the initial tiles were level, plus it was stressful doing it for someone else vs for my own kitchen, but once things got moving it was a pretty simple job. Even better, we picked up a dremel to cut the openings for outlets, and once we figured that out it was a much cleaner job than my last backsplash. I was a bit grumpy the late start meant I couldn't get it done in one day, but toward the end everyone came over (grandma had been watching the girl while the wife took the boy to a birthday party) for pizza so I couldn't be too crabby about it.
Saturday's quitting point
Day two went much quicker but still took longer than expected. My 90 minute estimate easily turned into twice that. More outlets and a window took me so much longer than two plain walls, pretty much reducing my weekend to the role of human pillow, which I am currently playing with the girl snoring away on me. Ah, dad-life.

The bright side is the wife knows how much I hate grout, so now that the tiles are on the wall my part of this project is done. The other bright side, other than getting a dremel out of this, is I'm wondering if I should build a console table for their entry way to help with staging. Always cool to find a reason to put a project together.

Friday, April 28, 2017

The table survived!

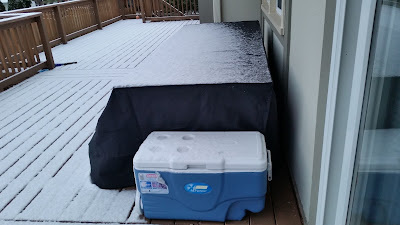
The cover came off our patio table this week and I was pleasantly surprised to see how well it held up over the winter. Of course, no measurable snow over Jan/Feb for the first time in 150 years probably made for a pretty easy winter to survive but hey, you never know how things are going to work out.
Looking chilly in early March.
Hey hey, looks pretty good.
Seeing the table back out filled me with joy for the few days it wasn't raining this week. Unfortunately we were only able to eat out there once but hey, it is only April. There might be plenty of things wrong with the table, and lots I would do differently on another build, but it served us well last summer and I'm hopeful about getting at least one more out of it. A few coats of poly next weekend would probably go a long way towards helping with that too. There's always something to work on.

Wednesday, April 26, 2017

A spill and a scrap arm-table

I spilled a glass of water on myself the other night; I left it on the arm of my chair and forgot about it until I went to stand up and knocked it into my lap and then the floor. Which wasn't as bad as it might have been, considering it was a plastic cup and I usually have my tablet or laptop with me but this time I did not. But the thought of drenching my surface had me hunting through my scrap bin for something I could turn into a table.
Typical set up: balanced but dangerous
Lots of scrap to use.

Thankfully I still had a good chunk of 1x10 left over from the desk, so with a few quick measurements I had the dimensions for a top and two sides that would span a pair of chair and couch arms. I needed just over 13' to span the arms, and then split the leftover equally for the two sides. I added one last bit of scrap to make one side longer to hopefully keep things steady. Time will tell.
Glued & screwed
Lightly sanded
Stained and poly'd
One thing I didn't think about until I was already staining was that adding that third piece means the long arm has grains going two different ways. It's a neat enough seam that with some sanding you can't feel the difference, but you can definitely see it. And it has cut edges on the outside vs the other pieces having finished edges that match so the stain is darker on the outside bottom edges. It's a little unsightly but you don't really see it once it's on the couch.
Ta da! New phone pic too.

Nothing like a quick scrap project to scratch my project itch. I'm starting to wonder if I should try my hand at some joint-work eventually. For now, nothing wrong with the simplest solution. Pocket screws, a little sanding, stain, poly, and we're done. Will this survive the rigors of a living room that's home to two rambunctious little ones? I honestly don't know. But it can get stashed on the console table when no one is using it. I look forward to putting my coffee and surface on it during my next day off.

Friday, April 21, 2017

Scrap shelf to cover open corner

When I finally got the desk upstairs, that meant having to rearrange the boy's room a bit to keep things from feeling too crowded. We moved two of those pre-fab cube shelves to a different corner to make room for the desk, putting them at the other end of the wall. That corner already had a small dresser nearby, so I left the cube shelves in an L-shape to keep the corner open. Desk in, things are still feeling pretty open, everyone's happy.
fancy phone picture

The only problem is that an L-shape left an open square where the shelves meet, wasting space and inviting the inevitable nuisance of having to fetch toys/books/junk that fall in there over time. So why not throw together a square to cover it and give the boy one more surface to cover with power rangers stuff. So much power rangers.

I'd kept the crib spindles from the side I cut off, not knowing what I would use them for but thinking they looked too good to just throw out. As luck would have it, 7 of them added up to nearly exactly the distance I was looking to cover, so I cut those 7 to the measurement in the other direction, and them glued them as a square with other scraps attached to the bottom. Viola, instant shelf.
Gorilla white glue instead of wood glue

The cube shelves got attached with corner braces so they felt a little sturdier, and I flipped two to set the shelf on. As a last touch, I added an upside down three-wall brace to the back corner so things wouldn't tip over with stuff on it.
Leaving this open felt like just asking for trouble.
No more opening, no problem.

Jobs like this fill me with an overwhelming sense of dad-hood. Using scrap, building shelves, figuring out a way to jury-rig everything, I haven't felt this much like a dad since the girl spilled some juice at steak & shake and I had a handkerchief on me to clean it up with. No one even has to notice it, but I feel better knowing it's there.

Thursday, April 20, 2017

Here's the re-finished Poang

Speaking of finishing what you start, the poang is back in the basement looking sharp. Of course I couldn't get this project done without one more mistake; adding a lacquer coat after the poly left some pretty rough patches, leading to more sanding and re-applications of poly. But that was minor considering what this chair looked like at the start of this idea.
Now I can start putting things back together.
Color testing with the cushion back on; not terrible.

The chair was a lot easier to work with once it was broken down a little more. I could put it on the bench to wipe the poly on at least, which saved my back some trouble. The ottoman got one less coat, since it doesn't get handled as much and at this point I was pretty much done and just wanted it back in the basement. And hey, cheers to me for not losing any hardware while I worked on these so everything could go back together.
Yeah, that's actually halfway decent.

Even with all the mistakes, I think this was a project worth doing. Looks aren't the highest attribute on my list of what furniture needs to accomplish, but the chair is much more visually appealing now that the ottoman matches. And it's still comfortable as hell when I want to sit somewhere the kids can't come jump on me.  

Tuesday, April 18, 2017

Crib desk finally moves

Measure twice, cut once. Or alternatively, measure not, then cut pieces off so your project can fit through doors and go where you wanted it to go in the first place.

We had some guests over Easter and one of them volunteered to help carry the crib desk from the garage to the boy's room. Great, I thought, clear out my space so I can make something else this summer. And the first half of the trip was beautiful. Out the garage, in the front door, through the hall, all in one piece.

Then we got to the boy's door. Whoops.

Feet came off, we still needed two inches of clearance. The front legs, the ones still attached after chopping the curved portion off, came off, we needed another quarter inch. So I got out the jig saw, and chopped two spindle pieces off and viola, desk in room.
Which meant lots of other furniture moving, since it takes up a lot of room.
Just remind me not to look at it from the side for a while.
With the legs and feet back on everything is level and sturdy. There are just two extra holes where the old spindles came from. They'll probably get attached eventually, but for now it was pretty cool to see how happy the boy was to have his own place for art. When I make the girl one for herself, I'll be sure to measure first.

Monday, April 10, 2017

Maybe not as messed up as I feared.

A darker stain seemed to do the trick for our poang, getting both the chair and ottoman slightly closer in overall color. Plus, it doesn't show the scuff marks quite as much and went on a little more even, so it might be worth getting a few coats of poly on to see if this chair is salvageable.
That's a little more like it.

Big sigh of relief at this point.
Might still have to spray some lacquer eventually.
Thank goodness this looks a little better, b/c I wasn't too jazzed about the idea of turning everything glossy black. Now I just need to find some time on a decent day to spay the lacquer outside so we're not dealing with fumes all day. Hopefully a decent finish matches up well with the black cushions and we're back to actual chair status in the near future. As long as I can put everything back together.

Friday, April 7, 2017

more like "messing up" a poang

Surprise surprise, trying to stain our poang hasn't gone great so far.
These actually don't look terrible...
But they don't really match the chair either.
Hoo boy.

A bit blotchy, and lighter in tone than I was expecting since the stain isn't getting into the wood like I had hoped. Looks like I didn't sand quite as much as I should have.

This bummed me out more than I thought it would. I shouldn't be surprised that some of these projects aren't successful, but honestly it's happened so infrequently that when it does it's a real downer. I'm going to give it a few days to sit while I weigh my options.

Option one is try a second coat with a darker stain I already have on hand. See if that helps things look any better without sanding everything again. That means option two is if I'm not happy with a second stain coat, sand everything off and start over. I don't feel like that's in any way going to happen. The real option two is buy some black spray lacquer, and just coat the entire thing and make it nice and shiny. Honestly, that might happen anyway so I might as well give option one a shot and keep my fingers crossed.We'll have to see what happens over the weekend.

Monday, April 3, 2017

punching up a poang

Working on the crib desk got me thinking about other items that could use a re-finishing around the house, and the two that jumped out right away were the poang chair and ottoman in the basement. The origins of the chair have been lost to the sands of time, it's just been with us for as long as we can remember. But the ottoman we picked up while staging our condo. Which explains why they're two different colors, since I bought the wrong one. Whoops. At least I managed to get matching pads, even if they could use a wash by now too. But we can fix the matching now, so why not bust out the sandpaper and see if we can't stain them a nice, dignified walnut.
Forgot to take a picture before I started. Had to use the way-back machine to find one.
But first we fix, or at least make better, a few of the joints on the chair. Mostly, the one at the bottom that's missing a screw and somehow hasn't made the chair fall out from underneath anyone. At least it's motivation to get out the clamps and wood glue, b/c I've been meaning to do it for a looooong time.
This has been a long time coming.
These clamps are the worst but sometimes they do the job.
With that done, we can sand off the veneer and get the wood in some kind of condition ready for stain. I realize I probably should have taken these apart more to really get them ready, but honestly it's not like they're real furniture. 
Those are similar enough starting points this might actually work.
I disparage the chair and IKEA in general, but that doesn't mean I don't love sitting in it. It's super comfortable and I kind of wish we had a better spot for it than the basement. Even without having a real home for it, I can't bring myself to throw it out. Re-staining it won't help us find a better place for it, but if it gets a cosmetic upgrade it'll make my argument for not throwing it easier to make. Now all I've got to do is find time to do the rest of the work.