Monday, January 29, 2018

my new desk, start to finish

Ugh. This winter has me a little down right now, as I deal with a job that actually challenges me on a daily basis, and fitting in classwork. I don't have a lot of free time right now, so I'm trying to recapture the enjoyable feelings I get from working with my hands by posting a start-to-finish on the desk.

I need to take more pictures of the raw materials.


A quick aside: I don't know if I was just getting careless or getting through the year without any bruises finally caught up to me, but my hands took some punishment on this project. Got a decent looking blood blister on my palm when I pinched it between two plywood sheets, got another one on a finger moving the glued-up top around. And to finish, I slammed my thumb up against the bottom of the cut-out while I was trying to chisel it out enough to fit the outlet in. But for something using a table saw, planer, and router, I guess a few nicks is a small price to pay.


Yeah, I bought my chair. Not really something I felt like I could build myself and still match the type of chair I was hoping for. But there's plenty of room for me to spread out now, that's for sure. I've already spent several evenings there, either getting discussion posts done, drafting big chunks of papers, or finishing drafts and turning them in, and I love how I can have everything on one surface. Including a whiskey, as you can see in the pic below. It reminds me of being in college and taking over a table in the library. It's weird how nostalgic I feel about it.
Yup, even got some blinds for the window. 
It took a little longer than the week I tried to squeeze it into, but now that it's up and together it's been great so far. This went long enough into the new year that I guess this is a 2018 project instead of 2017, but looking back 2017 was pretty successful even without this last build. Being so busy I still haven't cleaned up from working on the beds and this so close together, which really needs to happen at some point. I'm wondering if I should re-do either the patio table or the console table this spring, but that's gonna have to wait until things get cleaned for sure. Oh well. Something to shoot for when this round of classes are over.

Monday, January 15, 2018

Hurray, a chair!

I got that desk done just in time; I had two short papers due Sunday night that needed finishing but no time during the week to make any progress. So this weekend it was time to actually use the new office setup, only things weren't quite complete since my chair didn't get here until Friday night.
Yeah, there's a chair in there. I'm surprised too.
Putting together a chair after the kids went to bed seemed like the perfect way to put off working on the papers. It's not like I could use the desk without somewhere to sit after all.
Pieces all out, I think I can handle this. 
Box as workstand, viola.
I went with a sled bottom b/c I haven't had great experiences with wheeled chairs at home. The thought of all the damage we did to the floors in our place on Belmont still makes me feel bad when I think back. But the chair fits, so at least I could work at this point.
That works. 
And right to work
Things still aren't quite set up, as now I realize I should get some blinds on the window the desk faces. How we went two+ years w/o something on this window kind of mystifies me, but at least I was able to finish everything for school this week.

Friday, January 12, 2018

Putting the desk together

Okay, all the pieces are finally done and I've cleared out the old writing table in the office. Time to move everything in and set up the desk for the start of classes.

Carrying that top out of the garage and up the steps might have been the hardest part of this project. But points to me for leaving the legs off and moving everything in pieces; even if that wasn't the initial plan it made it a lot simpler to maneuver through the hall and into the office.
This room feels smaller with all the pieces out...
Ooops, probably should have sanded down here too. Hopefully felt helps.
With the back legs on I attached the top to the shelves with a handful of L-brackets, inside and on the back. I think that should do it; I was going to glue it down, but being able to take it apart without wrecking it if I ever need to move it meant no glue.
Ta da!
One last silly issue, the power strip came with screws but they were silver vs black. Not a huge deal but why not match it to the surface of the plate? I saved two of the bracket screws to use there instead, and think with that this build is a wrap.
One last touch.
Like a glove!
Man this room really needs to get painted. And the built-in shelves probably have to come down; they're too small to hold any real books. A project for another time. But I love how this desk came together, and it turns out the shelves are a nearly-perfect fit for the textbooks I've picked up. I'm not really crazy about having classes back in session right now, but at least not having proper work-space is not an excuse I can use. Now I just have to wait for my chair to get delivered.

Friday, January 5, 2018

testing out wipe on poly

Big surprise, my desk build has ground to a halt as I try to find time to put a finish on and get it as close as possible to the picture I had in my head at the project's start. Trying to finish both sides of  a tremendously heavy table top turned out to be quite an endeavor.

The good news is taking so much time gave me a chance to figure out what power management might look like around the desk. Initially I was just going to put a grommet like I did on the boy's desk, but that turned out to be a real pain over the holidays. He had a tree on it all Christmas that you had to crawl under the desk to plug in. Not doing that every time I have to work on something for school. Something right in the top seems like a more sensible thing to try. Thankfully I found one on amazon and dropped it in while I was testing finishes. I think it adds a nice functional touch without calling too much attention away from the butcher block.
Damn, this was surprisingly challenging to cut out.
But I think it will end up worth it.
That "focus on the block" thought process is the same one that ultimately had me skipping a stain and just sealing the top. Why not leave things as plain looking as possible. I ended up trying wipe on poly after not really liking how the triple-layer stuff worked out on the media stand. The stand still looks good, and I used it again to finish the kids' beds, but I don't really like working with it. It clumps up and it's difficult to keep it from getting too thick and having to sand down a lot of white gunk. I thought a wipe on poly might mean a smoother finish with less gunk. Mixed results with this as well, but I think that's in large part to doing this while it was balls cold out. I might not have been outside in -20 weather, but that still makes it damn cold in the garage.
One last dry fit with a back leg on just in case.
First coat, slight difference. Woo boy, this is going to take a while.
5th coat at this point, I think?
Shiny. I wish it would stay that way.
It went on smooth but thin, so there are a lot of layers on the table at this point. It's been a couple days now of putting a coat on before work, and then another at night after a run. I should have just picked up some epoxy instead. But things are getting finished, and now I just have to carry everything upstairs to put it together. Which is well-timed, b/c classes started next week and my project time has shrunk back down near zero. At least I'll have somewhere nice to work now.

Wednesday, January 3, 2018

Shelving desk legs

I basically used 8 2x4's-worth of wood for that butcher block, it is damn heavy. Flipping it to sand each side has been an adventure, so I've had to re-think my plan for the legs a little. Initially I was thinking a shelf on one side, with two of the old table's metal legs on the other. I'm not sure that's enough now, so with a second plywood board around why not make a shelf for each side and then run the legs along the back of the desk.
That's straight enough. Now I just have to build a 2nd one just like it.
I threw the first shelf together without any real plan. Split the plywood, cut it to the approximate height of the metal legs, and use the extras as the shelves. Things came together nice enough, but after putting so much work into the top I wasn't really feeling the visible lamination layers. Time to figure something out to cover those. No surprise here, this build has spiraled pretty far beyond what I first envisioned, but at least I had proof of concept that the shelves would work.
Okay, I like where we're headed.
Thankfully, following the same steps got me a second cabinet similar enough to use on the other side of the desk. To cover the edges, I trimmed some leftover 2x4 into .5" cubes to glue on as edging. Would buying some veneer been easier? Probably. But using what I already had sounded a lot more appealing than another trip to a store. It's damn cold out.
More glue, some brad nails, and lots of time.
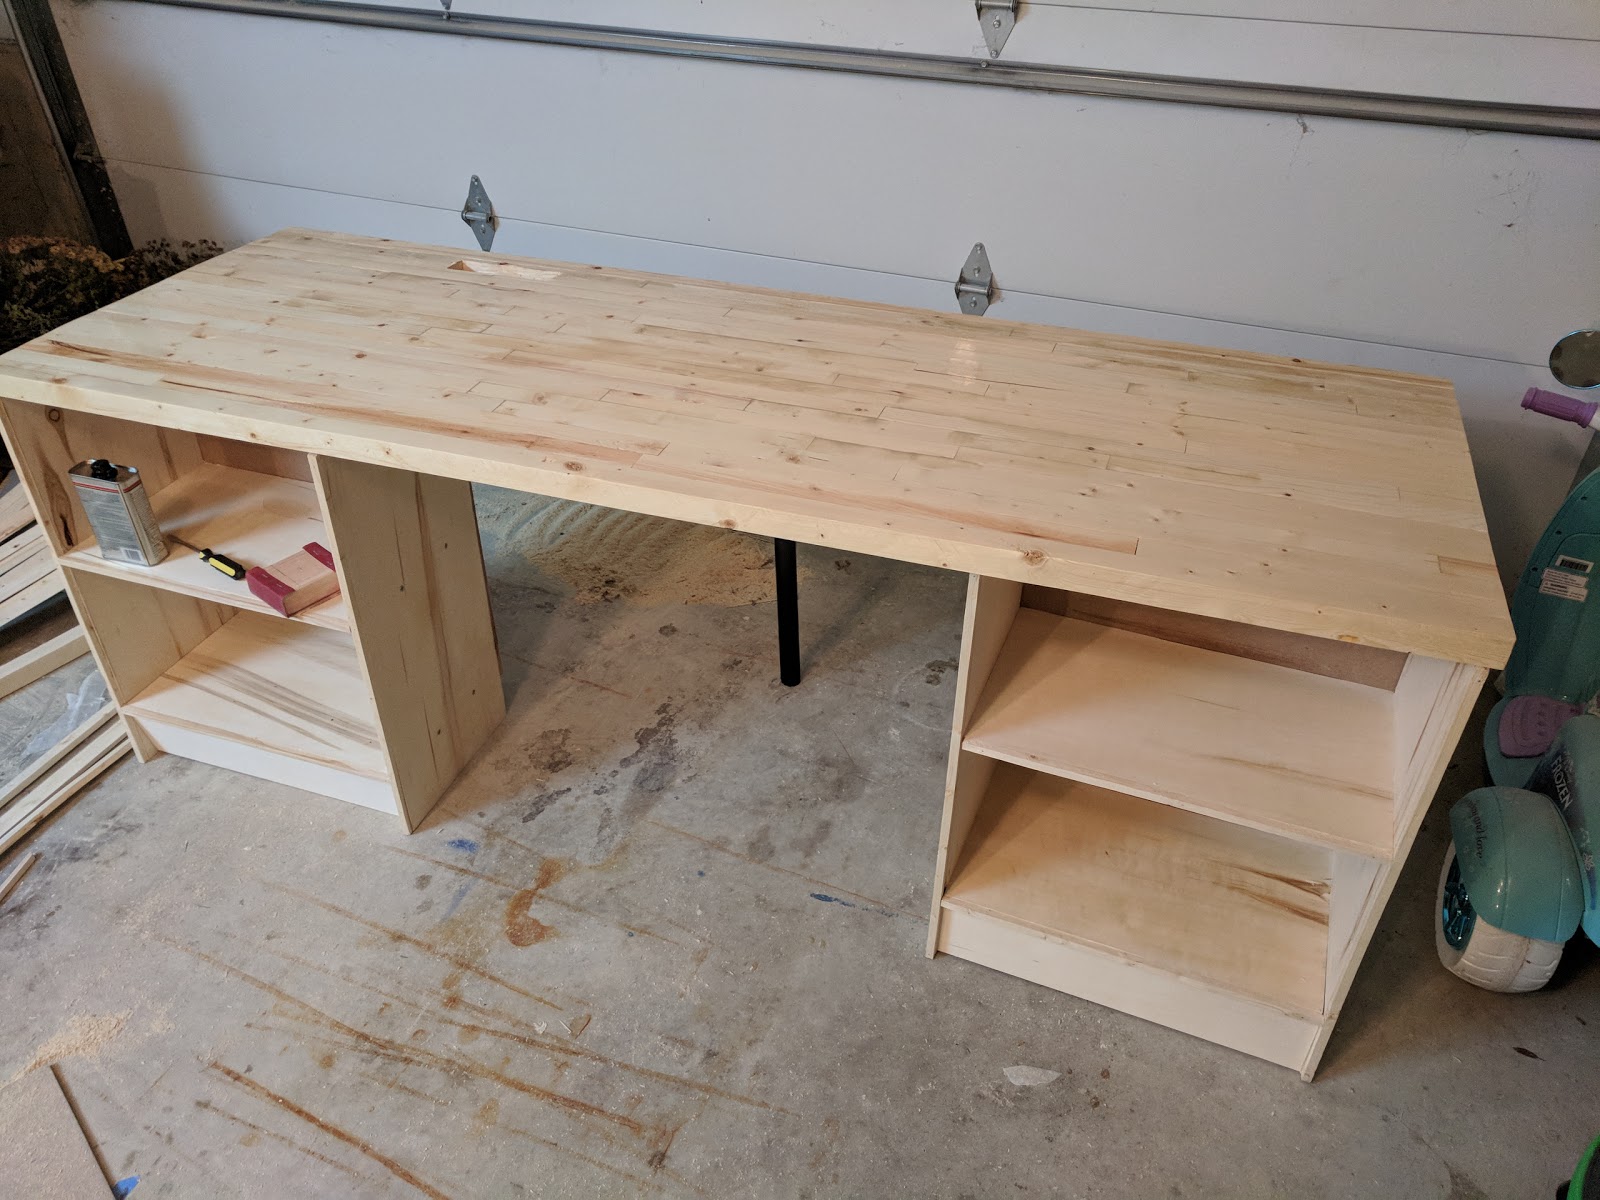
Okay, a little mismatched but those will hold some books
They might have looked good, but they ended up about a quarter inch shorter than the old legs and I couldn't squeeze one in to fit under the top when I tested things out. Whoops. I panicked for a second, but then I realized I could easily route some placeholders for the top plates or whatever they're called. Hey, if you've got the tools you've got the talent, why not let it rip.
The bottom doesn't have to be pretty, the top just has to be level.
This really slowed me down, since I can't really hammer or router when I'm working at night once the kids are in bed. But the final version of this project is rounding into shape in my head and I like how it's looking. With the edges covered and some hardboard on the back, I think everything is ready to get stained and even better, I can use the shelves to hold the top while I work on that. Now I just have to figure out what I'm actually going to use, then I can worry about where to put this all together.